React is one of the most popular JavaScript libraries for building user interfaces (UIs). It’s widely used for creating interactive and single-page applications (SPAs) that provide a seamless user experience. In this guide I will focus on the task how to create a React App with Typescript.
Why TypeScript?
TypeScript is a JavaScript superset with the addition of optional static typing. This implies that you can include type annotations in your code, which can help to catch type-related errors early in the development process. TypeScript is a popular choice for developing large React applications, as it can enhance the maintainability and quality of the code.
Why Use TypeScript with React?
- Type Safety: TypeScript helps you catch and prevent common JavaScript errors even before you run your code, which can save you a lot of debugging time.
- Better IDE Support: TypeScript provides improved code autocompletion, refactoring tools, and better documentation in code editors.
- Enhanced Collaboration: When working in a team, TypeScript’s type annotations can make your code more understandable and maintainable.
- Scalability: As your React project grows, TypeScript can help you manage the complexity by providing clear and robust type definitions.
- Increased Job Market Value: Knowing how to work with TypeScript in the context of React is a valuable skill that can make you more attractive to employers. Many job postings for web development roles specifically mention TypeScript as a desired skill, so learning it can enhance your career prospects.
Prerequisites
To follow this guide to create a React App with Typescript, you should have a basic understanding of JavaScript and React.
If you’re new to React, don’t worry; the React documentation is a good place to get started.
What You’ll Learn
By the end of this guide to create a React App with Typescript, you’ll know how to:
- Set up a new React app with TypeScript
- Use the terminal to navigate your project, run development servers, and execute common commands for React and TypeScript development.
- Create React components using TypeScript.
- Understand and use TypeScript type annotations.
1. Install Node JS
To get started, you need to have Node.js installed on your computer system. Node.js is a Javascript runtime environment that allows you to run JavaScript code on the server side. Navigate to https://nodejs.org/en/download to select and install the version that suits your operating system.
The Node.js installer includes the NPM (Node package manager). To see if you have Node.js installed already, run the command node -v on your terminal. This displays the version of Node.js installed, otherwise an error is shown.
2. Navigate to Your Desired Directory
Now that you have a runtime environment and the package manager installed on your machine, you can go ahead and create your project. First, you need to open your terminal window. You can do a quick search for “Command Prompt”, or “Command Line” if you use a Mac.
Navigate to the desired directory for your project by typing cd command, followed by the directory name and the enter key. Say you want your project in the “Documents” directory, the output should be like the block below.
C:\Users\PC>cd Documents>3. Create Your Project
Run the following command.
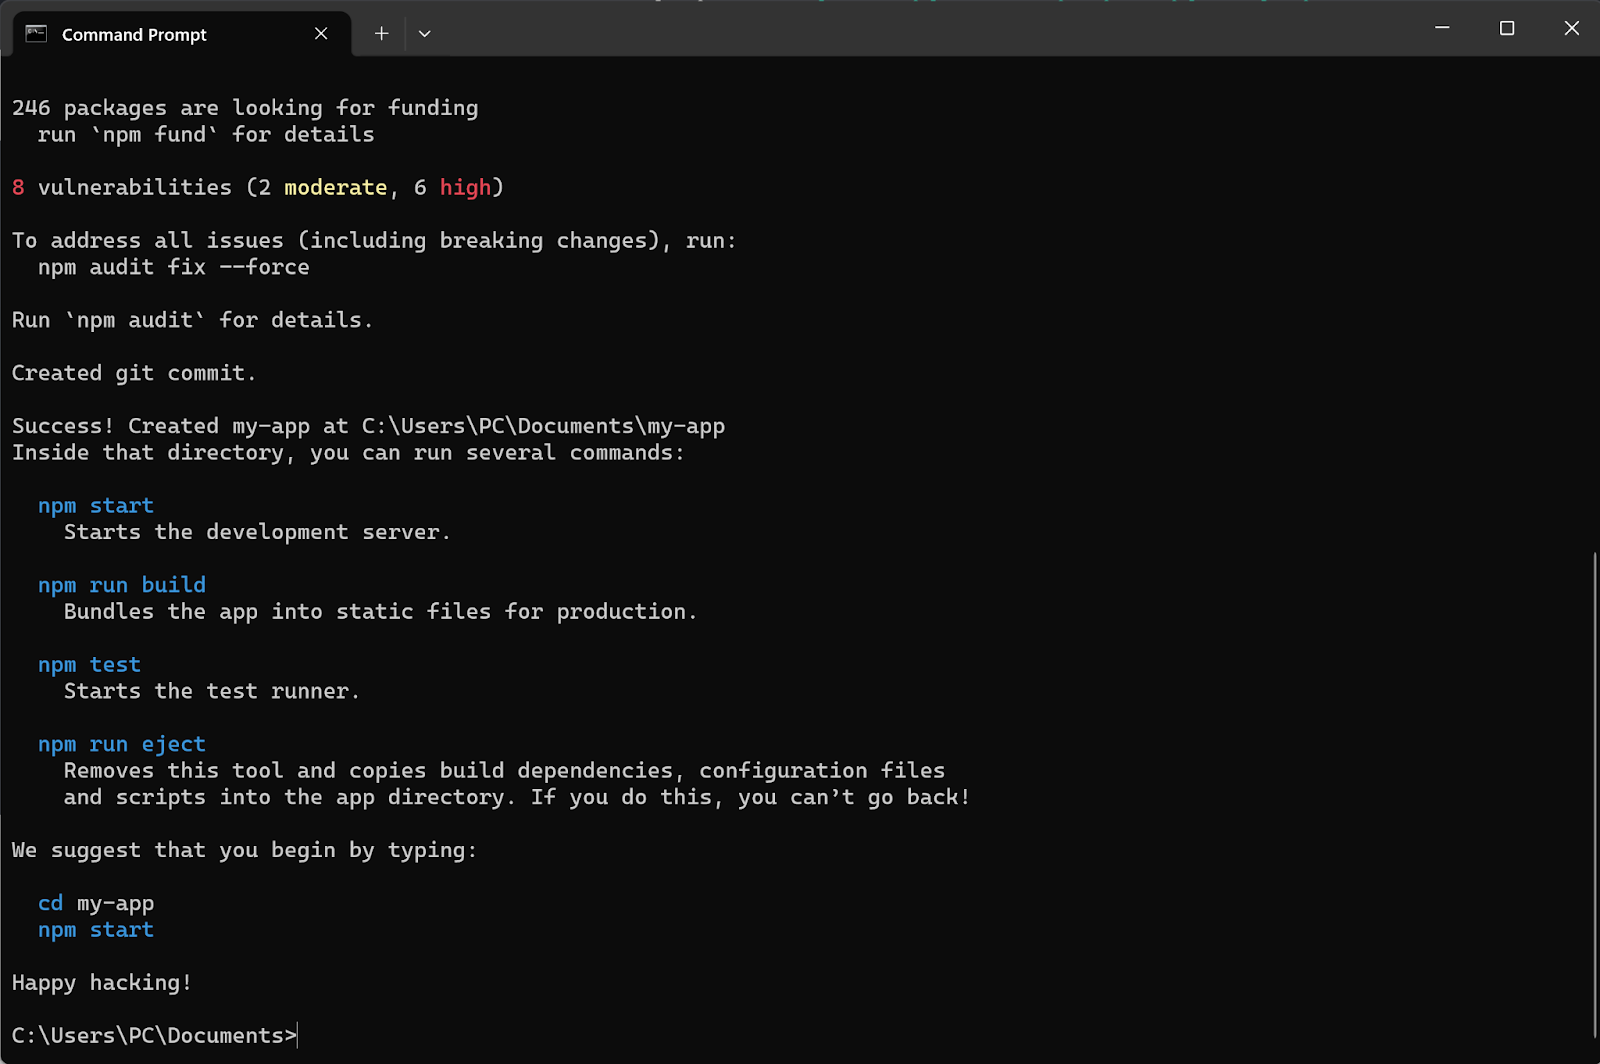
npx create-react-app my-app --template typescriptThis command utilizes Create React App, a tool that helps in the setup of React projects. Once you run this command, the folder “my-app” will be created in the directory you specified earlier. You can change the name of this folder to your project title while running the command, or even after the project has been created.
The –template typescript flag instructs Create React App to employ the TypeScript template, ensuring a TypeScript-enabled development environment.
The project creation process should be done in seconds and you will have the output below.
4. Open Your Code Editor
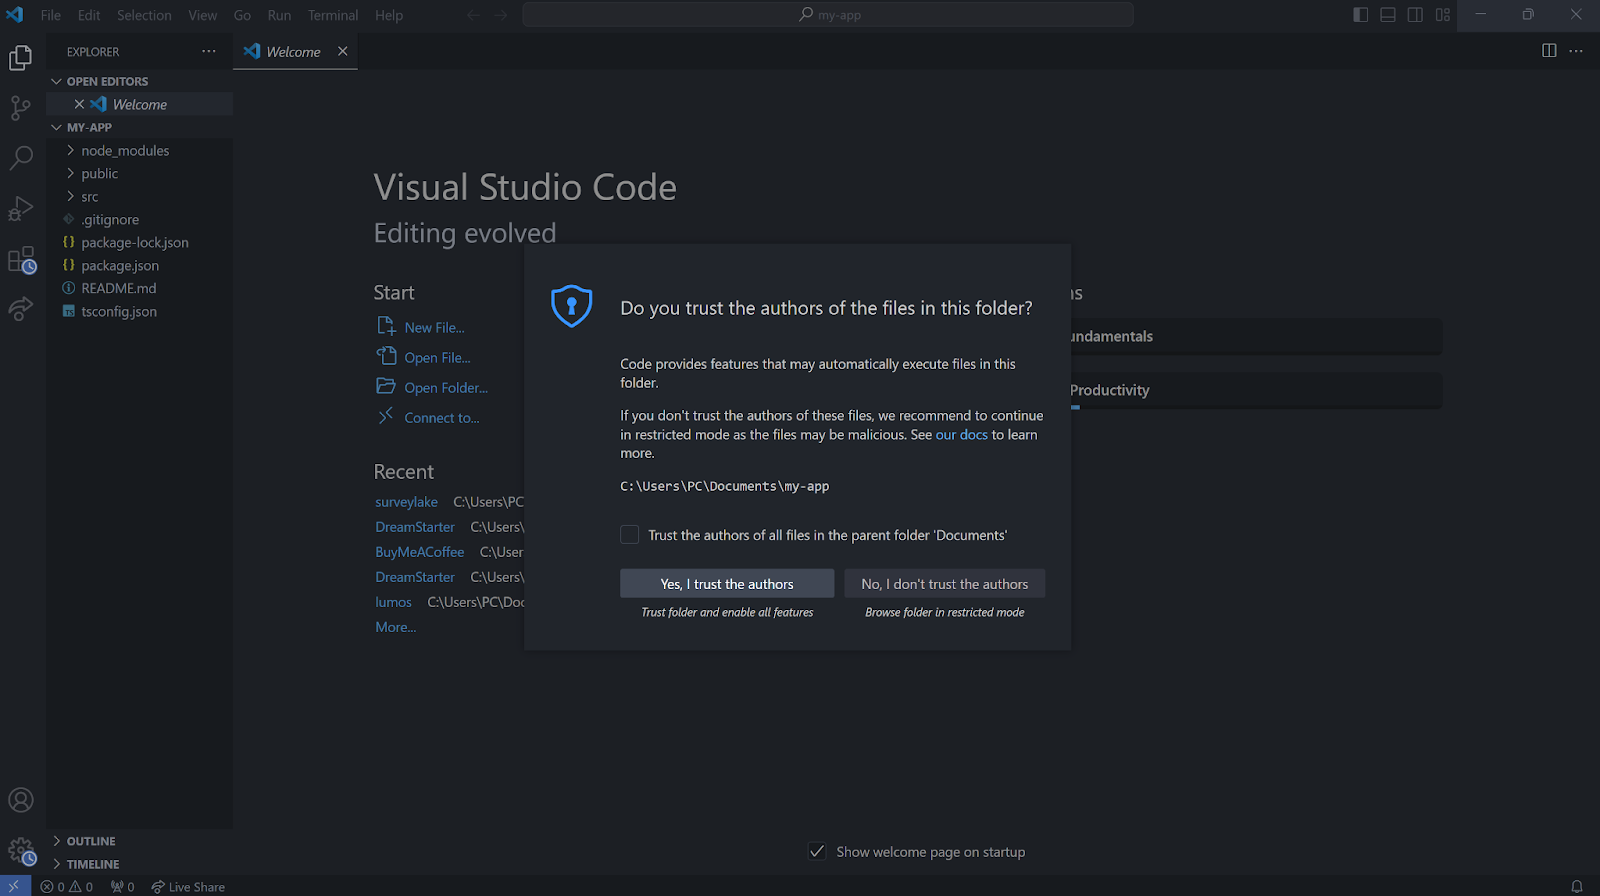
Once the project is created, change the directory into the project folder and open it with your default code editor. To do this, run the command code.
C:\Users\PC\Documents>my-app>code .Click on the “Yes, I trust the authors” button, or grant access permission required by your code editor if you are not using VS Code.
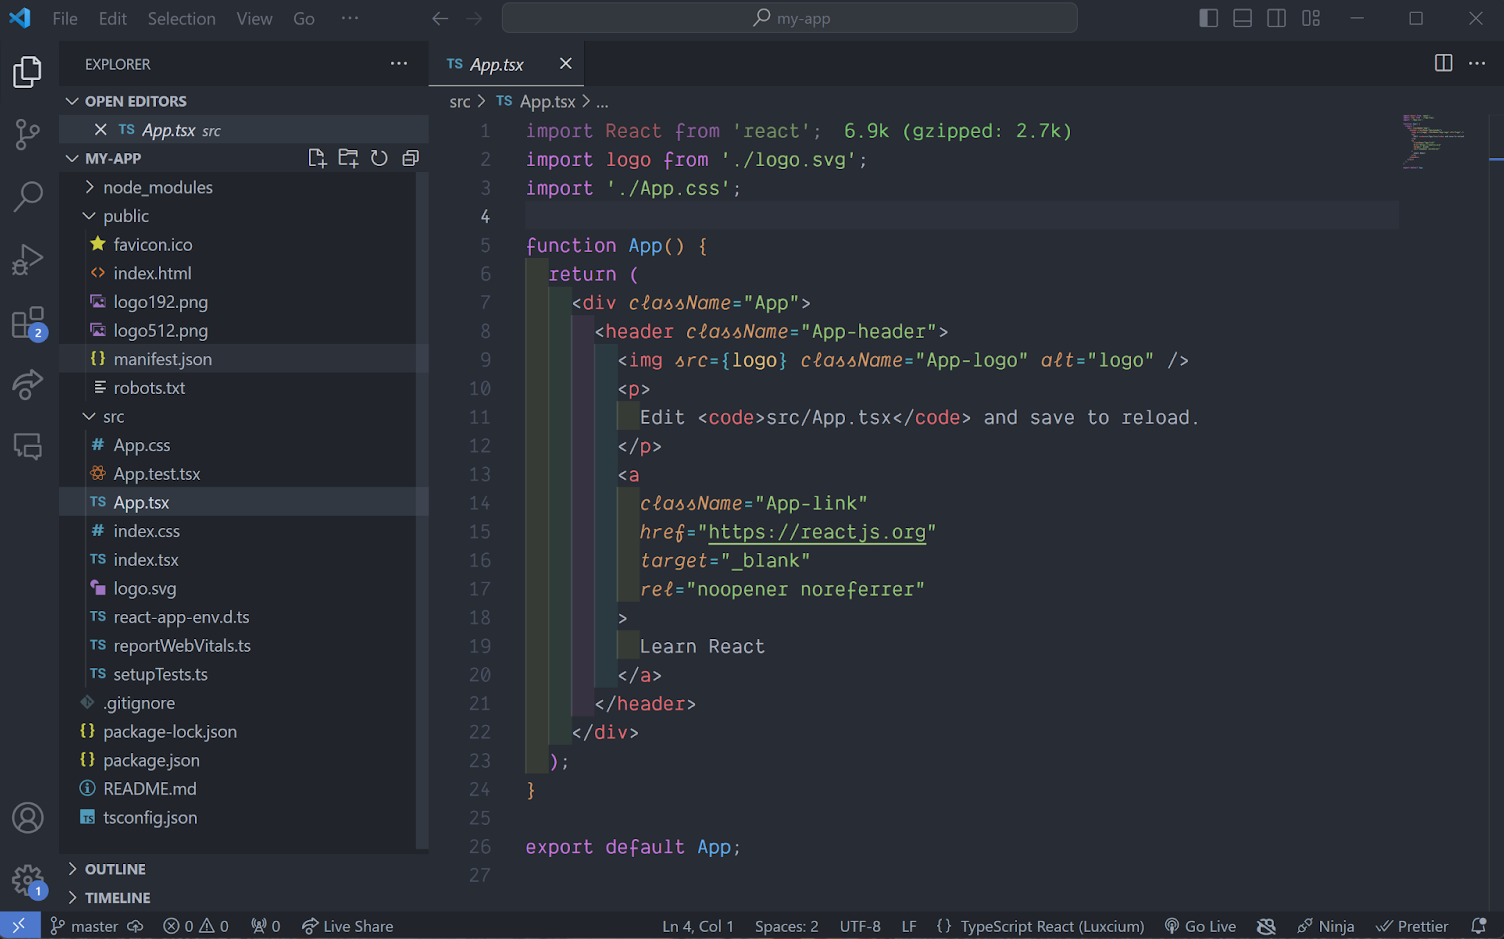
With this, you have your basic react app that uses typescript for type checking ready! Your project folder structure will look like the left panel of the code editor interface below. You’ll notice that the files have the .tsx extension for TypeScript.
You can continue to add components, styles, and functionality to your application as needed.
5. Start the Development Server
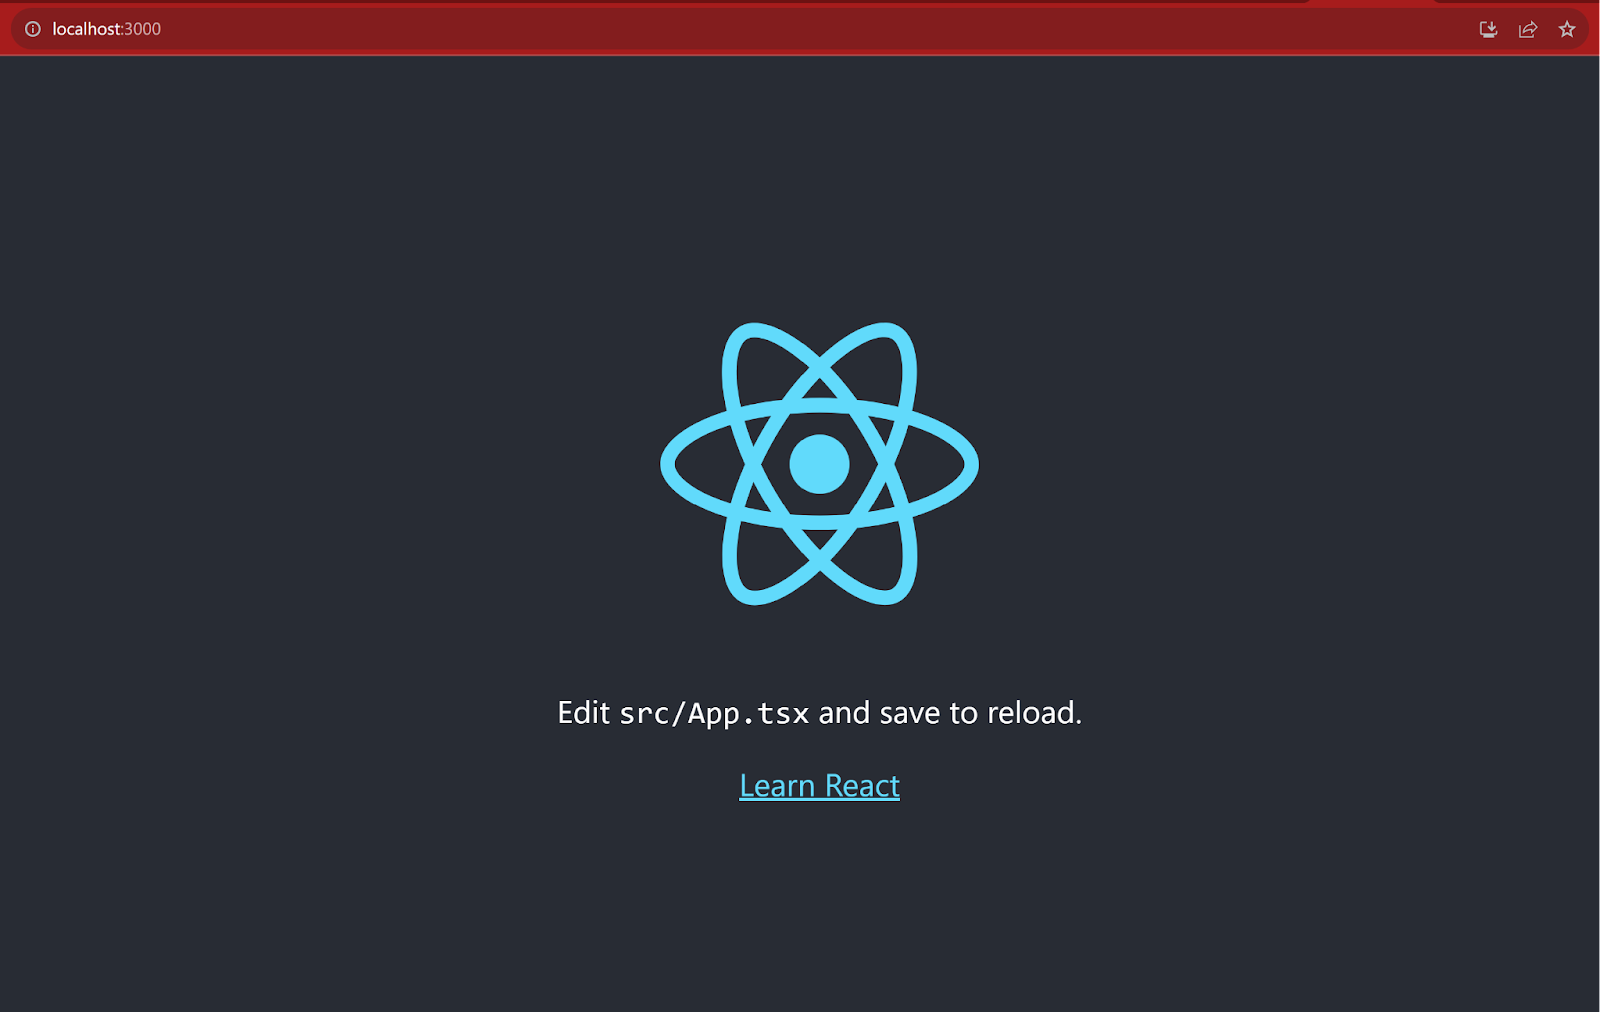
To see your project go live in action, make sure you’re still in the project directory, and run the command npm start
C:\Users\PC\Documents\my-app>npm startThis command will start the development server, and your React app will automatically open in your default web browser. If your browser doesn’t open automatically, you can manually open a web browser and navigate to the following address:
http://localhost:3000/You should now see your React app with TypeScript in the browser.
Any changes you make to your code will trigger hot-reloading, so you can instantly see the updates in the browser without needing to restart the server. Let’s test that out by making some changes to the App.tsx file.
import { useEffect, useState } from "react";
import logo from "./logo.svg";
import "./App.css";
function App() {
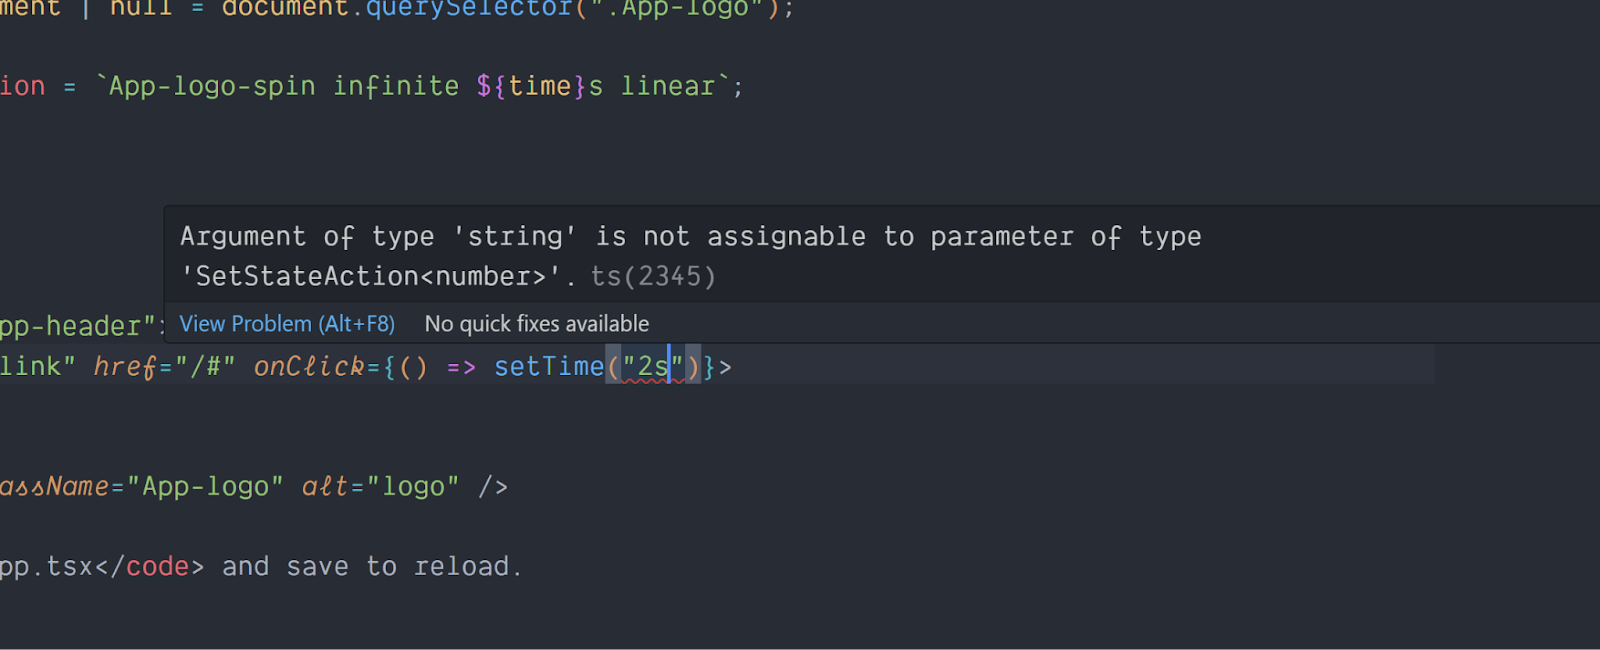
const [time, setTime] = useState<number>(1);
useEffect(() => {
const element: HTMLElement | null = document.querySelector(".App-logo");
if (element) {
element.style.animation = `App-logo-spin infinite ${time}s linear`;
}
}, [time]);
return (
<div className="App">
<header className="App-header">
<a className="App-link" href="/#" onClick={() => setTime(1)}>
Start Spinning
</a>
<img src={logo} className="App-logo" alt="logo" />
<p>
Edit <code>src/App.tsx</code> and save to reload.
</p>
<a className="App-link" href="/#" onClick={() => setTime(0)}>
Stop Spinning
</a>
</header>
</div>
);
}
export default App;This component renders a web page with a logo that can be spun using CSS animations when the user clicks on “Start Spinning” and stops when the user clicks on “Stop Spinning”. Here’s a breakdown of the code:
- useState is used to define a state variable called time with an initial value of 1. This state variable will be used to control the speed of the animation.
- The useEffect hook is used to apply the animation style to the .App-logo element whenever the time state changes. The effect will run when the component mounts and whenever time changes.
- Inside the useEffect hook, it first selects the .App-logo element using document.querySelector(“.App-logo”), and if it exists, it sets its animation CSS property to apply a spinning animation.
- The return block renders the content of the component. It includes a “Start Spinning” link and a “Stop Spinning” link, which when clicked, update the time state to 1 or 0, respectively.
The type annotations are like labels that tell the computer what type of data a variable or function should store or work with. They help make your code more predictable and catch potential errors early. Let’s break down the type annotations:
- useState<number>(1): Here, you’re using TypeScript’s type annotation. It tells TypeScript that time is of type number. In other words, time can only store numeric values (like 1, 2, 3, etc.). The 1 you provide is the initial value for time.
- : HTMLElement | null: This is another type annotation. It specifies that element can hold either an HTMLElement or null. HTMLElement is a type for HTML elements, and null means it might not find an element with the class .App-logo .
Type annotations in your code help ensure that the variables are of the correct data type. For example, time must always store numbers, and element can either store an HTML element or be empty (null). This way, TypeScript can check your code for type-related errors and provide better code hints, making it easier to work with and understand your code.
Summary
In this beginner-friendly guide, we’ve explored the exciting world of creating a React app with TypeScript. We started by introducing TypeScript and its benefits, but we didn’t stop there. We also emphasized the importance of using the terminal as an essential skill in your web development journey. Knowing how to navigate and command your development environment is a valuable skill that will serve you well.
To provide a hands-on experience, I have included a live CodeSandbox example. Feel free to tinker with the code, modify components, and see how TypeScript and React work together seamlessly.
Happy Hacking!